Tags
aakaash kandil, aakash kandil, akaash kandil, akash kandil, diwali, India, karanji, maharashtra, marathi
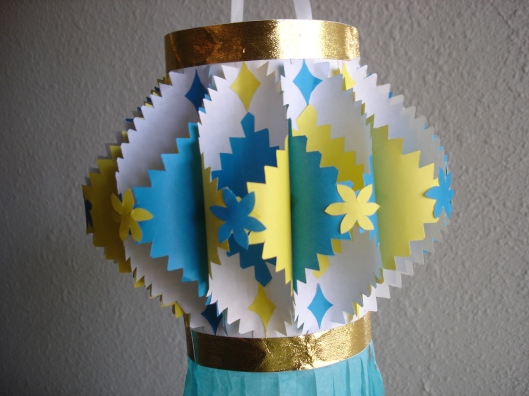
(Update: If you don’t want to make the kandil pictured above, but instead want to make the traditional one with the wooden frame, the instructions are here.)
As a kid, I frequently made this kind of aakaash kandil for Diwali, so it is the one I know best. It is also the one I wrote about in a post last year. (I sometimes make the more traditional aakaash kandil as well. More about that here.) This one consists of a cylinder of thick paper (cardsheet or construction paper), with shapes called “karanjya” stuck all around it, and, of course, fluttering “zirmulya” underneath. (The singular of karanjya is karanji, and yes, the name comes about because it looks like the food item.) Here is the method of making it, with stepwise pictures.
You can use my dimensions to make an aakaash kandil that is on the smaller side. Scale up all dimensions by, say, 1.3 for a bigger one. (So the 7in dimension below will become 9in in the scaled up version.) You are likely to need 15-16 karanjya in that case.
Cut out a 7in by 14in rectangle of cardsheet. This will later become the cylinder.
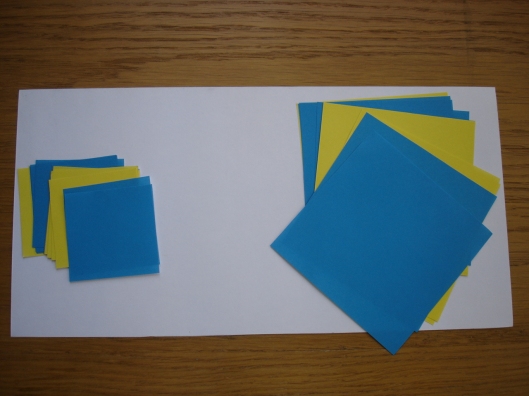
For the karanjya, cut out squares of size 4.5in. (This gives a diagonal of about 6.4in, as against the 7in height of the cylinder.) I needed about 12 karanjya, so I cut out 12 squares. (6 blue and 6 yellow, in my case.) If you have paper that is coloured on both sides, go ahead and use that, and feel free to skip the smaller squares that I used. (Especially if you have the brightly coloured purple and pink sheets of tissue paper found in India, go for it.) Since my paper was white on one side, I wanted to decorate the white side and decided to stick on the smaller squares. (Note that my small squares were 2.5in in size, which I later felt was too small. A size of 3in or even 3.5in would be much better.)
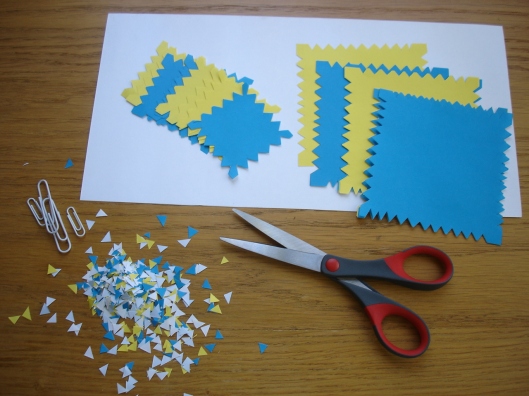
I like the karanjya to have serrated edges, so I cut out triangle shapes out of the bigger as well as smaller squares. This was easily the most time consuming part of the whole exercise, even though I did it by stacking together all 12 sheets and holding them together with paper clips and cutting them all in one go.
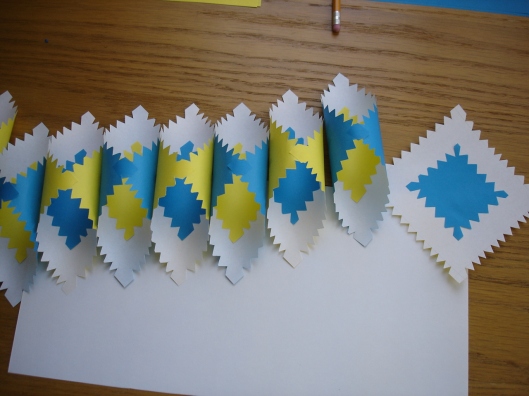
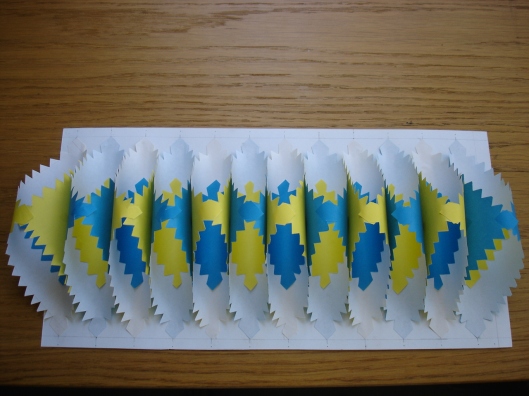
Make all the karanjya. To do this, I first stuck on each small square on the white side of a larger square of opposite colour. To make the karanji, just stick together the opposite corners of the large square, overlapping the corners. (I suppose one could also stick together the inner surface of both corners, obtaining a pointy karanji. I have never seen it done that way, or done it that way myself, I can’t comment on how it works, but it should be interesting to try. One advantage of the non-pointy karanji is that you can later stick on some decoration at that spot.)
Once you have all your karanjya ready, it is time to stick them onto the cardsheet. If you want to eyeball it, that is fine. I was feeling fussy and marked out the spots on the cardsheet first. Since the height of the karanji is about 6.3in, mark out horizontal lines at a distance of about 0.35in from the the top and bottom edges. Mark out a 0.5in margin at one of the shorter edges. This margin will glue to the other short edge later on, to give you the cylinder. (I marked this off on the right edge. This may have something to do with the fact that I am right-handed. It’s okay either way.) With 12 karanjya to equally space in 13.5in, they need to be 1.125in apart. Mark out spots that are 1.125in apart on the two horizontal lines. (The precise location of the first of these points does not matter. I had it be 0.5in from the (left) edge.)
Start sticking the karanjya. (In my case they were alternating colours. If you have multiple colours, feel free to do whatever pattern you want. Lots of random colours looks good too.) You may feel that the karanjya are too closely spaced and look squished. This is as it should be — they will have more room once the cylinder gets made. In fact, to prevent them from looking too spread out later on, lightly glue together the side of each karanji to its neighbours.
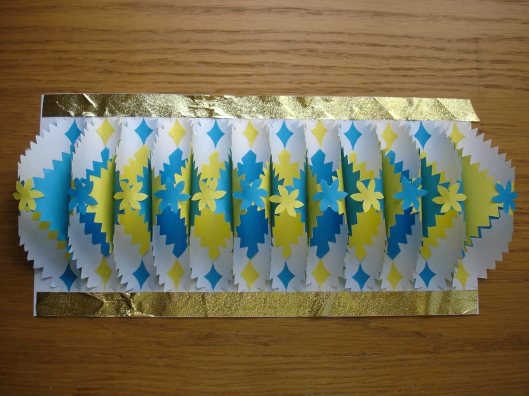
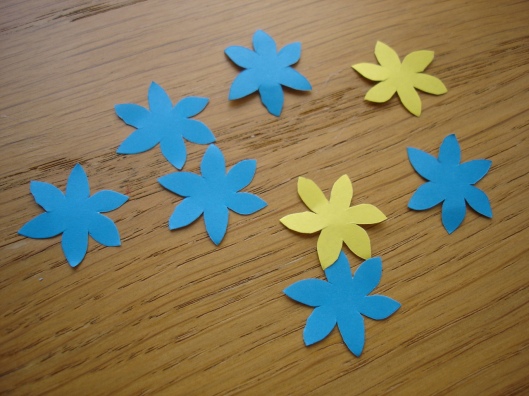
Once all the karanjya are on, you can add other decorations. I added the strips of golden paper at the top and bottom edges. (I do this almost always because it makes the whole thing look neater. Thinner double edges are good too. Hopefully your golden edges will not have the crumpled look that comes from recyling the ribbon off an old gift item. (My goal was to make this aakaash kandil without going shopping.)) Another thing I always to is to add decoration on the tip of the karanji. In case it was flowers of contrasting colour. You can also do golden spots, as I did last year. Because I could see that there was more white space than I wanted thanks to the inside small square being too small, I also added little diamond shapes with concave edges and contrasting colour, above and below the smaller square. You may want to just skip this.
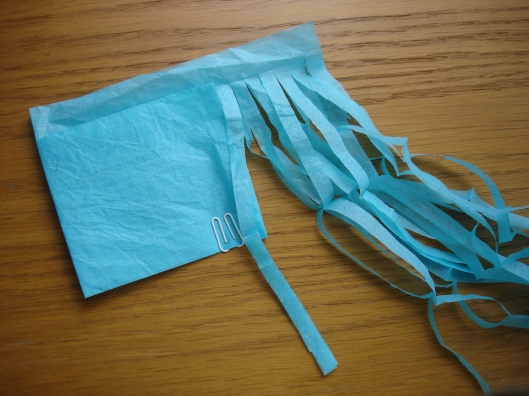
Next you make the zirmulya. You will need paper that is about 14in wide and 11-15in long, depending on how long you want the zirmulya. 14in gives the same width as the cardsheet, you can reduce it a bit if you want to avoid the margin we drew earlier (i.e. make it 13.5in). The height of the paper should be as long as you want the zirmulya, plus a bit more (about 0.5-0.75in), to stick to the cardsheet. I think that a length of 1.5 x height of cardsheet is good i.e. about 10.5in + 0.5in = 11in. If in doubt, feel free to make them longer — you can always trim off the bottom ends later.
I like to cut the zirmulya by folding the paper and drawing faint lines along which to cut. With thin paper you can easily make many folds and the folds aren’t too permanent. (Of course, if your thin paper that is not crumpled because it is not recycled from gift wrap, that is an added bonus.) If you have thick paper or are feeling fussy, make the cuts without folding. (Be sure to have some good music playing in the background. I did that last year without music and it took a while.) Here, I folded the paper twice in the horizontal direction (to get 4-layers of paper) and once in the vertical, to get 8-layers total. If using the folding method, make sure you leave alone the top margin as you make the horizontal folds and the cuts. My zirmulya were about 0.375in wide, to suit the smaller aakaash kandil.
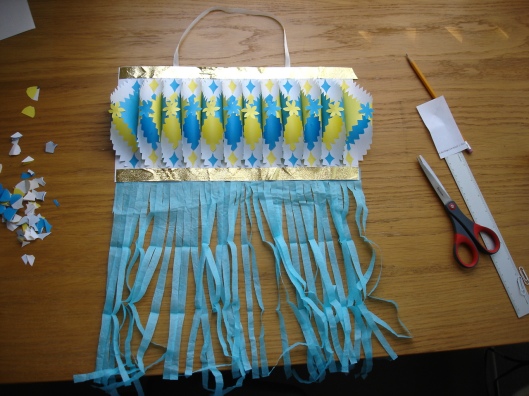
Stick the zirmulya to the cardsheet by applying glue to the top edge of the zirmulya. Attach string at the top to hang the kandil from. I glued on the string and then glued on a square of paper on top of it for added insurance.
You are ready to make the cylinder. Apply glue to the 0.5in margin that we had earlier marked out on the cardsheet and glue it to the underside of the opposite end. Just as you lightly glued all the karanjya to their neighbours earlier, now glue together the first and last karanji. You are done.
***************************
I hope your aakaash kandil floats gently on the breeze and casts colourful, dancing light all around. Happy Diwali!

Pingback: Diwali in my heart | Handful of Shadows
Pingback: How to make an(other) aakaash kandil | Handful of Shadows
amazing creativity…..thanx
Thanks for the comment. Happy Diwali!
Very nice Akash kandil, Happy Diwali
Thank you
So much helpful… so easy method.
Thanks for post.
You are welcome! I thought it would be nice to show all the steps, because it really is easy to make once everything is explained.
nice hai aakaash kandil
happy diwali
Thanks. Happy Diwali to you too.
Very beautiful lantern.What kind of craft paper did you use? And is it safe to hang an electric bulb inside this paper lantern?
Oh and Happy Diwali to you and your family 🙂
I used thick drawing paper (similar to cardsheet in India) for the cylinder, and origami paper (similar to regular craft paper in India) for the karanjya. For the zirmulya it was thin/transparent paper (sometimes used as gift wrap in India). I did not hang an electric bulb inside this lantern, but as kids we used to, so I think it should be alright.
Happy Diwali to you too 🙂 And do let me know if you make this!
Thanks for the quick response. I will definitely give it a try 🙂
Pingback: Diwali Lantern Making Tutorial #13 - THE CRAFTY ANGELS
Pingback: DIY Diwali Lantern | Bombay Belle
I was looking for measurements and referring your measuremenus made a lanyern, turned out perfect thanks.
You’re welcome Chitra. Happy Diwali!
hi your tips r very very helpful.. just finished with our aakash kandil. me n my 7 yr old son together made this.
hi. your tips are very very helpful. just me n my 7 yr old son, just finished our aakash kandil following your steps. thanks.
You are welcome, Gauri. Happy Diwali.
Pingback: How to make an aakaash lamp Easy Craft Ideas
Pingback: How to make an aakaash kandil Easy Craft Ideas
Thanks you weri much bro
Pingback: How to make an aakaash kandil | Master Craft Ideas
Pingback: How to make an aakaash kandil – Get Easy Craft Ideas
Pingback: How to make an aakaash kandil – Easy Craft Ideas
Pingback: How to make an aakaash kandil | My Live Craft
Pingback: How to make an aakaash kandil | Easy Craft Ideas
Pingback: How to make an aakaash kandil – Simple Craft Ideas
Wow nice I done it in the school exam
Pingback: How to make an aakaash kandil | Creative Making Ideas Online
Pingback: How to make an aakaash kandil | Craft videos, Garden Ideas, Health tips, Lify Style, Beauty Tips, Cooking Ideas, Travel Ideas
nice one